


|
|
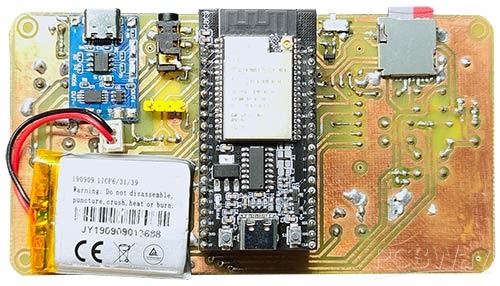
ESP32 Wrover Kit |
x 1 | |
|
|
TP4056 module with protection |
x 1 | |
|
|
AO3401 SMD P-Channel MOSFET |
x 1 | |
|
|
DM3AT-SF-PEJM5Hirose
|
x 1 | |
|
|
SMD Slide switch 1P2T |
x 1 |

|
FritzingFritzing
|
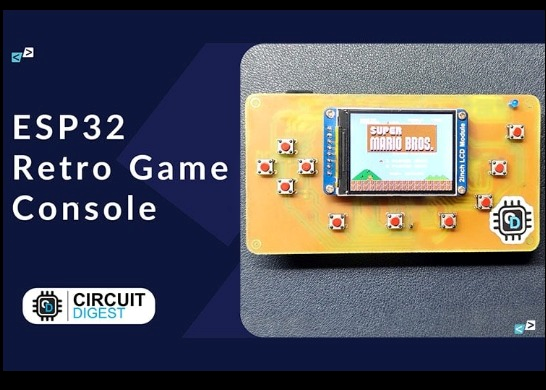
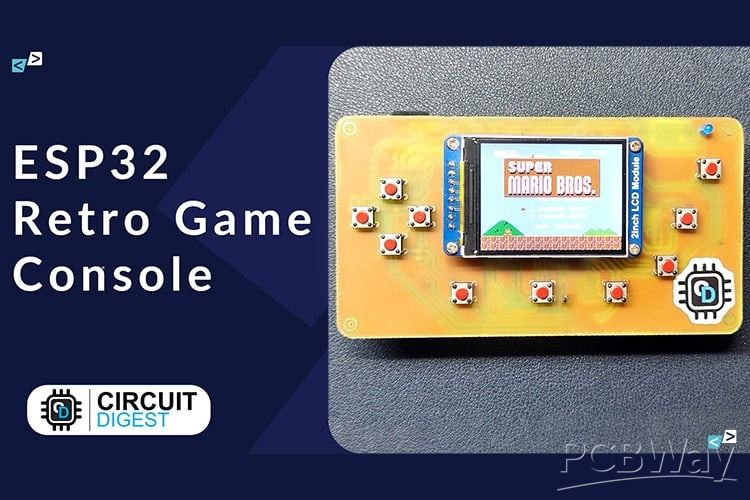
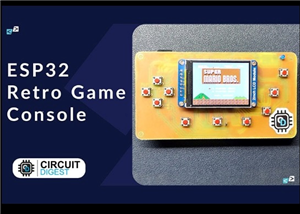
ESP32 Retro Game Console with OLED Display
Overview
This project demonstrates how to build a compact, handheld retro gaming console using the ESP32 microcontroller. With a small OLED display, tactile buttons, and open-source game libraries, this device brings classic arcade-style gameplay into a portable and low-cost format. It is ideal for beginners and hobbyists interested in embedded systems, DIY electronics, and game development. Discover practical DIY PCB projects with schematics, Gerber files, and real-world applications to improve your circuit design and electronics prototyping skills.
Key Features
- Portable, handheld design
- Powered by ESP32 for fast performance
- OLED display for crisp monochrome graphics
- Supports multiple retro-style games
- Simple push-button controls
- USB-powered or battery-operated
- Expandable for custom games and features
Hardware Components
- ESP32 development board
- 0.96" or similar OLED display (I2C interface)
- Push buttons (for navigation and gameplay)
- Resistors (for button pull-down or pull-up)
- Breadboard or custom PCB
- Connecting wires
- Battery module (optional for portability)
- Enclosure (3D printed or custom case)
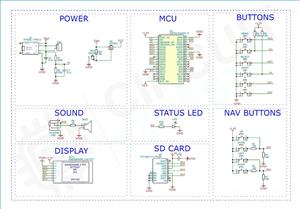
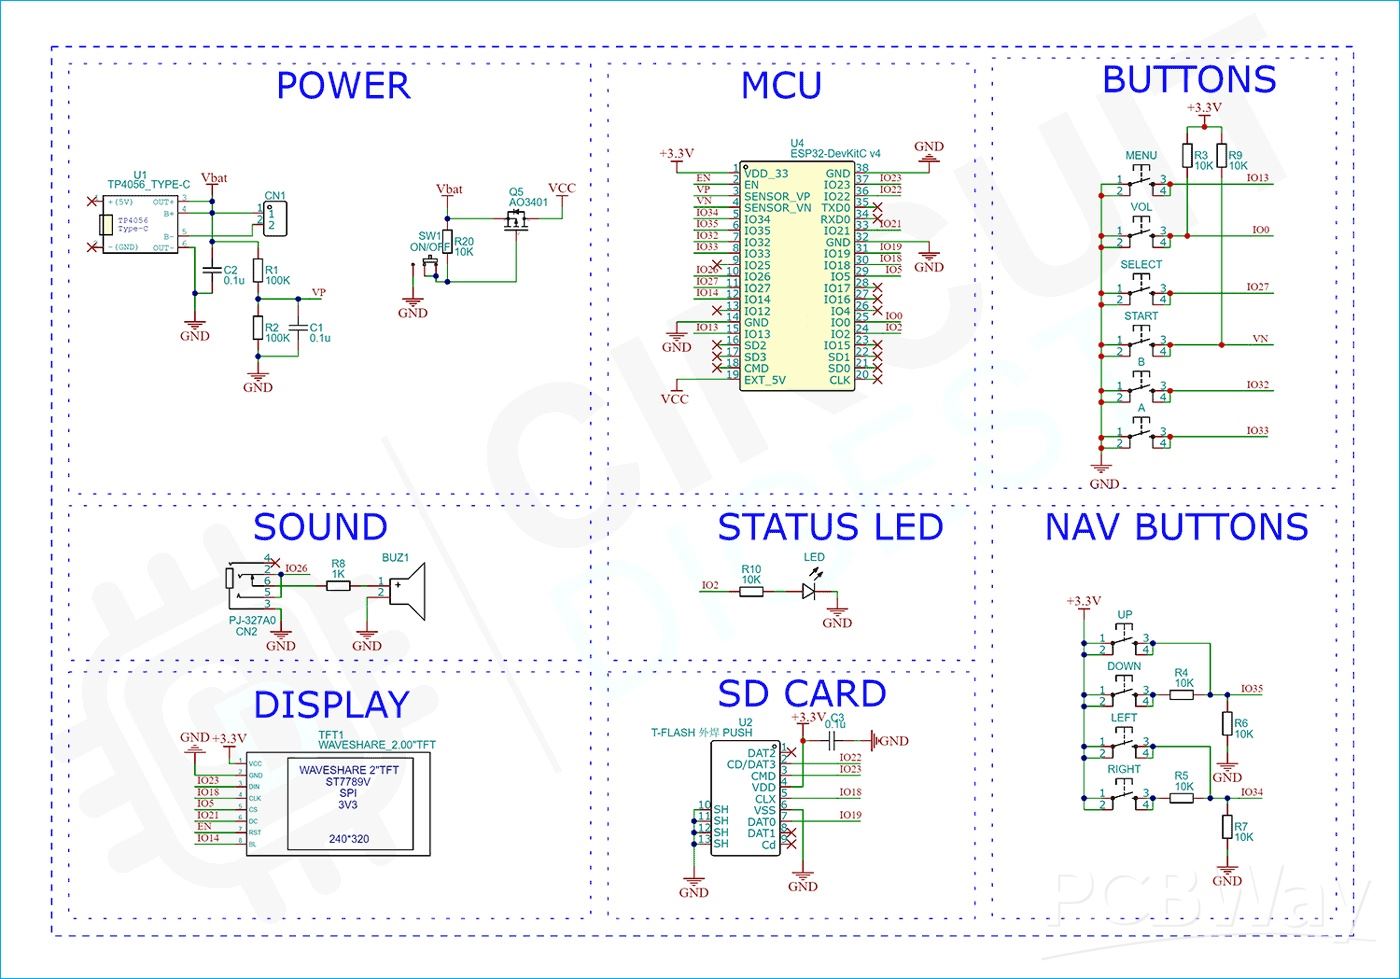
Circuit Design
The ESP32 acts as the core controller, handling both input and display output. The OLED display communicates with the ESP32 via the I2C protocol, reducing the number of required connections.
- Connect the SDA and SCL pins of the OLED to the ESP32 I2C pins
- Power the display using 3.3V and GND
- Connect push buttons to GPIO pins
- Use pull-down or pull-up resistors for stable input signals
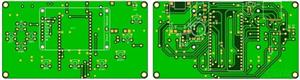
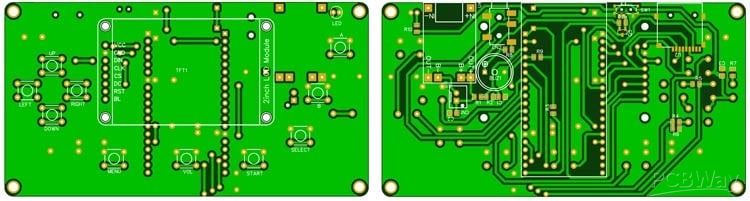
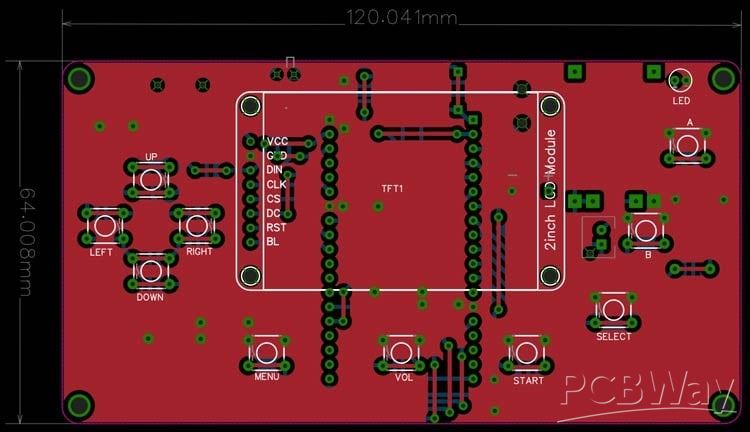
For a cleaner and more reliable build, designing a custom PCB is highly recommended. This reduces wiring complexity and improves durability, especially for handheld use.
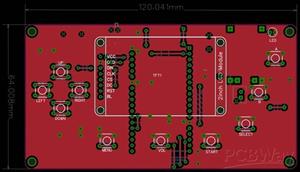
PCB Design Considerations
- Keep the layout compact for portability
- Place buttons ergonomically for comfortable gameplay
- Ensure proper routing of I2C lines to avoid noise
- Add mounting holes for enclosure support
- Include battery charging circuitry if using Li-ion cells
- A well-designed PCB not only enhances the appearance but also makes the project more robust and suitable for sharing or production.
Software and Programming
The ESP32 is programmed using the Arduino IDE or PlatformIO. Libraries for OLED displays and game frameworks simplify development.
Main Software Tasks
- Initialize OLED display
- Read button inputs
- Render game graphics
- Handle game logic and updates
Libraries Used
- OLED display library (e.g., SSD1306)
- Graphics library (e.g., Adafruit GFX)
- Game engine or custom game code
Game Implementation
Simple retro games such as Snake, Pong, or Flappy Bird can be implemented. These games rely on basic graphics and input handling, making them ideal for microcontrollers.
Game Loop Structure
- Read user input
- Update game state
- Render frame to display
- Repeat continuously
The ESP32’s processing power allows smooth gameplay and quick response times.

Assembly
- Connect all components on a breadboard for testing
- Upload and test the code
- Design and fabricate a PCB for final assembly
- Solder all components onto the PCB
- Mount the PCB inside an enclosure
Testing and Debugging
- Verify display initialisation
- Check button responsiveness
- Ensure a stable power supply
- Debug using the serial monitor
Applications
- DIY handheld gaming device
- Learning embedded programming
- Educational electronics projects
- Custom game development platform
Future Improvements
- Add a colour TFT display
- Include sound output (buzzer or speaker)
- Integrate a rechargeable battery with a charging circuit
- Add Wi-Fi features for multiplayer or updates
- Expand game library
Conclusion
This ESP32 game console is a fun and practical project that combines electronics, programming, and creativity. With a custom PCB and compact design, it can be transformed into a polished handheld device suitable for showcasing, gifting, or even small-scale production. Explore innovative ESP32 projects with circuit diagrams and code, covering IoT, automation, robotics, and smart systems for beginners and advanced makers.

ESP32 Retro Game Console with OLED Display
*Wpsload community is a sharing platform. We are not responsible for any design issues and parameter issues (board thickness, surface finish, etc.) you choose.


Attribution-MIT License
Read More⇒


Raspberry Pi 5 7 Inch Touch Screen IPS 1024x600 HD LCD HDMI-compatible Display for RPI 4B 3B+ OPI 5 AIDA64 PC Secondary Screen(Without Speaker)
BUY NOW


- Comments(0)
- Likes(2)
More by Jobit Joseph
-
 How to build a Wearable Air Quality Monitor Pendant using STM32 & SGP40 Sensor
This DIY Wearable Air Quality Monitor Pendant is a compact, battery-powered device designed to conti...
How to build a Wearable Air Quality Monitor Pendant using STM32 & SGP40 Sensor
This DIY Wearable Air Quality Monitor Pendant is a compact, battery-powered device designed to conti...
-
 Smart Digital Ludo Game Board with Multicolour PCB
Ludo, a beloved childhood game, holds a special place in our hearts with its simple and engaging gam...
Smart Digital Ludo Game Board with Multicolour PCB
Ludo, a beloved childhood game, holds a special place in our hearts with its simple and engaging gam...
-
 Electronic Dice with BLE Connectivity
Many of us fondly remember the joy of playing board games like Snakes and Ladders or Ludo during our...
Electronic Dice with BLE Connectivity
Many of us fondly remember the joy of playing board games like Snakes and Ladders or Ludo during our...
-
 3D printed Enclosure Backplate for Riden RD60xx power supplies
3D printed Enclosure for Riden RD60xx power supplies such as RD6006, RD6012, RD6018, RD6024 and RD60...
3D printed Enclosure Backplate for Riden RD60xx power supplies
3D printed Enclosure for Riden RD60xx power supplies such as RD6006, RD6012, RD6018, RD6024 and RD60...
-
 3D printed Enclosure for Riden RD60xx power supplies
 such as RD6006, RD6012, RD6018, RD6024 and RD60...
3D printed Enclosure for Riden RD60xx power supplies
3D printed Enclosure for Riden RD60xx power supplies such as RD6006, RD6012, RD6018, RD6024 and RD60...
-
 Suzuki Ignis Universal Armrest No Screw Adapter
I own a 2024 Suzuki Ignis. When I searched for an armrest for my car I couldn't find any domesticall...
Suzuki Ignis Universal Armrest No Screw Adapter
I own a 2024 Suzuki Ignis. When I searched for an armrest for my car I couldn't find any domesticall...
-
 Wireless Potentiostat for Electrochemical Analysis
This wireless potentiostat is based on the ADuCM355 SoC from Analog Devices, tailored for portable e...
Wireless Potentiostat for Electrochemical Analysis
This wireless potentiostat is based on the ADuCM355 SoC from Analog Devices, tailored for portable e...
-
 160 Channel Configurable DAC Controller
The DAC controller board features 160 individually controllable 16-bit DAC output. It can output vol...
160 Channel Configurable DAC Controller
The DAC controller board features 160 individually controllable 16-bit DAC output. It can output vol...
-
 ESP32 IoT Water Flow Meter with Real-Time Monitoring
OverviewThis project demonstrates how to build a smart water flow meter using an ESP32 microcontroll...
ESP32 IoT Water Flow Meter with Real-Time Monitoring
OverviewThis project demonstrates how to build a smart water flow meter using an ESP32 microcontroll...
-
 DIY GSM GPS Location Tracker with Arduino
Project OverviewThis project demonstrates how to build a simple and reliable location tracking syste...
DIY GSM GPS Location Tracker with Arduino
Project OverviewThis project demonstrates how to build a simple and reliable location tracking syste...
-
 IoT GPS Tracker with NodeMCU and Google Maps
OverviewThis project demonstrates how to build an IoT-based GPS tracking system using a NodeMCU (ESP...
IoT GPS Tracker with NodeMCU and Google Maps
OverviewThis project demonstrates how to build an IoT-based GPS tracking system using a NodeMCU (ESP...
-
 ESP32 Retro Game Console with OLED Display
OverviewThis project demonstrates how to build a compact, handheld retro gaming console using the ES...
ESP32 Retro Game Console with OLED Display
OverviewThis project demonstrates how to build a compact, handheld retro gaming console using the ES...
-
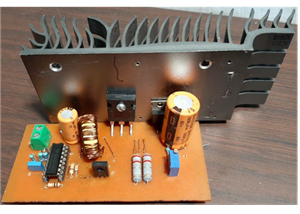 High Power Boost Converter Using TL494
OverviewThis project demonstrates the design and implementation of a high-power, high-efficiency DC-...
High Power Boost Converter Using TL494
OverviewThis project demonstrates the design and implementation of a high-power, high-efficiency DC-...
-
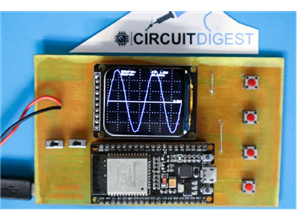 DIY ESP32 Oscilloscope Project
OverviewThis project demonstrates how to build a simple and affordable oscilloscope using an ESP32. ...
DIY ESP32 Oscilloscope Project
OverviewThis project demonstrates how to build a simple and affordable oscilloscope using an ESP32. ...
-
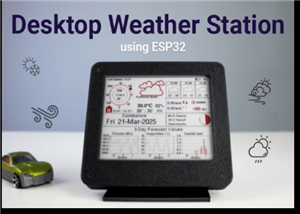 ESP32 Desktop Weather Station
Project OverviewBuild a compact desktop weather station using an ESP32 that measures temperature, hu...
ESP32 Desktop Weather Station
Project OverviewBuild a compact desktop weather station using an ESP32 that measures temperature, hu...
-
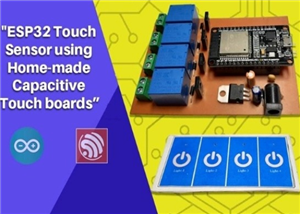 ESP32 Capacitive Touch Home Automation
OverviewMechanical switches wear out over time and can be prone to failure due to dust, moisture, or...
ESP32 Capacitive Touch Home Automation
OverviewMechanical switches wear out over time and can be prone to failure due to dust, moisture, or...
-
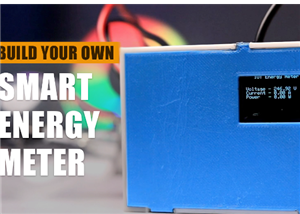 ESP32-Powered Smart Energy Meter for Real-Time Monitoring
ESP32-Powered Smart Energy Meter for Accurate Consumption TrackingIn modern electronics and IoT appl...
ESP32-Powered Smart Energy Meter for Real-Time Monitoring
ESP32-Powered Smart Energy Meter for Accurate Consumption TrackingIn modern electronics and IoT appl...
-
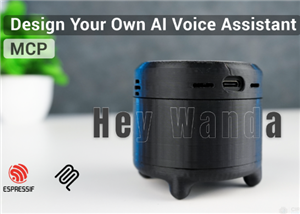 Build Your Own ESP32 AI Voice Assistant with MCP Integration
Project OverviewThe ESP32 AI Voice Assistant with MCP Integration is an advanced voice-controlled sm...
Build Your Own ESP32 AI Voice Assistant with MCP Integration
Project OverviewThe ESP32 AI Voice Assistant with MCP Integration is an advanced voice-controlled sm...
-
-
ARPS-2 – Arduino-Compatible Robot Project Shield for Arduino UNO
2531 0 5 -
A Compact Charging Breakout Board For Waveshare ESP32-C3
2985 3 8 -
AI-driven LoRa & LLM-enabled Kiosk & Food Delivery System
3193 2 1 -
-
-
-
ESP32-C3 BLE Keyboard - Battery Powered with USB-C Charging
3259 0 2


